Showing posts with label Recipes. Show all posts

Saturday, June 30, 2012

Delicious Summer Pasta

It's true, I eat a lot of pasta. But can you really ever eat too much pasta? The other day, I found myself with a great mix of flavors and textures to make a typical bowl of pasta feel gussied up. This could easily be turned into a vegetarian dish as well.

Here's what I used:
-1 avocado
-2 leftover chicken thighs (I prefer dark to light meat for more flavor, but anything works)
-1 ear of sweet corn, shaved
-half an onion, diced
-2 stems of celery, chopped
-2 cloves of garlic, minced
-2-3 oz. of herbed chevre
-2-3 oz. cream
-1 lb. linguini


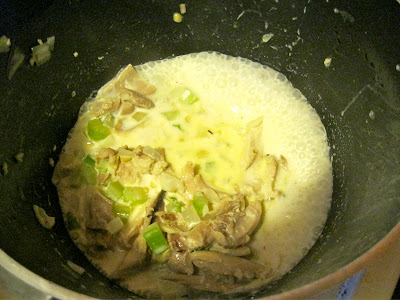
First, boil your pasta and get that out of the way. I love linguini because it's got some body to hold a heavy sauce, but works for more delicate sauces as well. Al dente, please!

Next, with a little oil or butter in the pan, toss in your onion till it starts to sweat. Add the garlic and cook till caramelized. (Sidenote: If your garlic starts cooking faster than the onion, I like to slow it down by adding a little water to let the onion "catch up." Many recipes start with garlic before onion, but that never seems to work for me- and I like the stronger flavor by adding the garlic later. But feel free to deviate if you're a garlic-first kind of person.)

Add the chicken and celery, just long enough to heat it up. (If you have raw chicken, cook that first!) Then toss in the corn. I like the corn and celery to have some crunch so the dish has a range of textures.


Add the cream and let it boil. I usually eyeball it to cover the veggies, but add more if you like a saucy pasta.


Toss in the linguini and using a tongs, mop up all that saucy goodness. Transfer to a bowl and add crumbled chevre, diced avocado and fresh pepper. Then invite me over for dinner.


Thursday, June 21, 2012

Near Riot Chocolate Almond Whiskey Truffles

Have you ever made chocolate truffles from scratch? If you've followed my previous blogs, you know I make them pretty often for parties (they're especially great for vegetarians and those on gluten-free diets, don't need their own plates or utensils, are so rich and decadent that most people only need one, and they take a lot less time than most desserts). Dark chocolate is better for you than cake, anyway- and goes a whole lot better with alcohol.

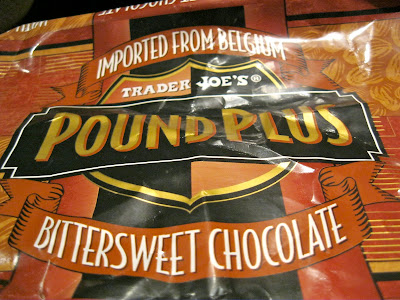
I love the Pound Plus chocolate you can get from Trader Joe's. It's the best value dark chocolate and is easy to work with. Only I totally spaced at the store, and snagged the kind with almonds in it, which inspired this new recipe (normally I prefer to make ganache without nuts because it's one less step).

This is the easiest way I know to make truffles. It takes some time to let everything cool and set, but takes less active time than most desserts. If this is your first time making these, read through all the instructions first. If it's a refresher, hopefully it is a simpler recipe.


So here's the recipe:
12 oz. dark chocolate with almonds
6 oz. heavy whipping cream
2 oz. salted butter
2 oz. whiskey

5 oz. chocolate reserved for enrobing
disposable latex gloves

Have the chocolate well chopped and in a separate bowl. To give myself a head start, I leave the chocolate in the package and smash it against a tile floor or hard countertop until the seams look like they'll rip. It will save you a few minutes of prep time because who really enjoys chopping up chocolate?


Boil the cream and pour over the chopped chocolate in bowl. Cover with Saran wrap and let it steam before you start stirring (stirring cools it down too fast without giving the chocolate the chance to melt completely).


Wait a few minutes to stir in the chocolate completely, then add your whiskey and butter. Make sure the butter is chopped up in little pea-sized pieces or it takes a surprisingly long time to melt and your ganache will risk having butter streaks in it. Every ganache recipe is better with butter incorporated- it leaves a silkier texture and adds a little salt to bring out the flavor.


Mix well. Then let it harden in the fridge with a layer of plastic to prevent condensation.


When it is set, you can start to roll it into balls. Don't worry about them being even because they are meant to be uneven and look like real truffles from the ground. Roll out all of the ganache and put into a freezer. It's okay if they're lined on a sheet pan or stacked in a bowl. This is where I strongly recommend wearing a pair of latex gloves. It keeps the chocolate from sticking to your skin and provides an extra layer of insulation between the cool ganache and your warm hands. It also will prevent fingerprints later when you pick up the truffles and make your life a whole lot cleaner.


Melt your reserved chocolate. Don't let it get too hot! And don't ever put over direct heat, just set a bowl above boiling water and take it off every few seconds to keep it from scorching.

Chocolate is messy and does not have a long wait time, so make sure you have an assembly line ready to go. The more organized you are, the more fun it will be to make them.

I have all the ganache rolled out so you don't have to worry about having to remelt the chocolate. This way you get it all in one shot. Since tempering chocolate is its own beast, I have the melted chocolate a little on the warm side and the cold ganache makes them set up almost immediately. I like lining a sheetpan with plastic in case of drips. Start at the farthest end and line up the finished chocolate towards you so the new ones aren't dripping over.


Put a little melted chocolate on your palm and roll the truffle in it. It's that easy and you can see how quickly it sets up when the truffles are cold to start. You can also see how messy it is, even with the gloves! I find them essential.


You can put them back in the fridge to help them set up, especially if they'll be on a plate in a warm room. This is the best party treat because they're small and unexpected. They also last a few weeks if properly stored in the fridge, so it's a great thing to have in stock!

Please share your experience making them and let me know if there were any directions that needed clarification.

Tuesday, May 15, 2012

Goddess Dressing in a Snap

I love this salad dressing so much, I would marry it if I could (but others should get priority ahead of me on that waiting list).

But seriously, this is great for so many reasons- it's thick and creamy, it has a little more substance than vinaigrette, but isn't as heavy as caesar. And the best part? It's vegetarian and vegan, so it makes the perfect addition to vegetable dips and salads for those finicky dinner guests (you know who you are).

It's also incredibly easy to make- barely 5 minutes to throw together in a blender. And it tastes as good as Annie's! I got this recipe from Jolinda Hackett- but here's the direct link.

Tahini "Goddess" Dressing
By , About.com Guide
My version of the tahini-based "goddess" dressing found in many health food stores and restaurants. If you like the store-bought goddess dressings, you'll love this easy homemade goddess salad dressing made with tahini, lemon juice and parsley. You might also want to try this recipe for goddess dressing with ginger.

Prep Time: 10 minutes

Total Time: 10 minutes

Ingredients:

  • 1/2 cup tahini
  • 1/2 cup apple cider vinegar
  • 1/4 cup soy sauce  (I use a little worcestershire or fish sauce to make it tastier, but then it's not vegetarian!)
  • 1 tbsp lemon juice
  • 1/2 tsp salt
  • 3 cloves garlic
  • 1/2 cup water
  • 2 tbsp dried parsley  (Oregano also works well)
  • 1 tbsp sugar
  • 1/2 cup oil

Preparation:

Add all the ingredients, except for the oil to a blender or food processor and puree until smooth and creamy. 


Slowly add oil until well mixed. Dressing will be thick, but you can always add a bit more water if you prefer a thinner consistency.


Thursday, April 12, 2012

food52 Love

I am not sure what has taken me so long to join the food52 community. (For you, Pop, it's like Facebook for foodies.)

I've been following Amanda Hesser ever since she inspired me to write a book about staging. She was a fellow trainee in Burgundy only ten years earlier than I, then moved on to write a bestselling book and write for the New York Times (no big deal).

Then a couple days ago, she wrote this article that changed everything for me. It's called "Advice for Future Food Writers," but could apply to any writer, or really any person in any industry, because each business is challenging in its own way. Hesser gives a very honest but encouraging look at writing in a world where all I hear is wild praise, or doom and gloom criticism.

Maybe I lied, and the article didn't change anything for me, if I'm being honest. I wake up every day and want to write, not because I imagine I can ever count on it paying the bills, but because I have to do it. It sure does help to have support from someone who's been in the trenches and can look up and say, "it's a long road, just keep on going." I know this, but always need to hear it. It's a good reminder that we are meant to keep having experiences for material, and mainly to keep writing.

Which would mean keeping fun distractions like social forums down to moderate use.

Tuesday, April 10, 2012

Limoncello for Slackers


There are few ingredients that delight me as much as Meyer lemons. Their zest has a more pungent aroma, but the juice is less acidic. Their sweet, fragrant quality makes them versatile for recipes both on the hot and cold side- and let's not forget, the bar side.

Tasting limoncello was my first vivid experience with a grown-up drink. Perhaps my most. It was my first time in Italy. I was 16. At the end of an intimate dinner in Sorrento, our inn keeper hosts pulled out a long, thin bottle filled with a mysterious pale yellow liqueur. My friends and I were presented with stemmed shot glasses of the lemony drink as a gift. We saluted, clinked glasses while looking each other in the eye, and took a cautious sip as it is intended. All except for me. I threw the shot back so fast I barely tasted it until the piercing burn of alcohol slapped my throat. The others stared at me and kept sipping.


I give you a very easy way to thoroughly enjoy an excess of lemons.

Zest as many lemons as you have. It should take ten or twelve for a liter of alcohol, but this is the shortcut version. Then juice them. Pour zest and juice into a bottle of vodka (you may have to drink some of it first to make more room). Let the zest and juice marinate for 1-2 weeks. I tasted mine every few days to understand its journey. When ready, strain out the zest (it will start to make it bitter if it isn't strained). I don't add water or sugar because meyer lemons will make a sweeter limoncello, but it also works well as a mixer.


Best when sipped. You can save the shots for that bottle of Old Crow lying around.

Sunday, March 25, 2012

Jucy Lucys

And what exactly is a Jucy Lucy? I'm glad you asked.

It's probably one of the most genius burgers I've encountered in a long time, a specialty of the Twin Cities.

 At Matt's Bar in Minneapolis, hundreds if not thousands of these juicy gems get churned out from a griddle the width of a kitchen sink. Two patties are sealed together around some kind of amazing cheese mixture that melts into a glorious liquid once it's grilled. (The "i" is deliberately omitted, since the veteran employee who posted the sign back in 1950 wasn't the greatest speller, if not in a huge hurry to get back to the griddle.

 Here, my friend's husband dresses his Lucy with the biggest helping of ketchup I've ever seen.

 Mitch enjoys her first, if not slightly painful bite. By the way, we were amazed to immediately get a table, since there's usually a line out the door for these babies.

 I approach mine gingerly so I don't destroy the roof of my mouth. The element of surprise is akin to Chicken Kiev, but it's best to anticipate it so no one gets hurt.
 An interior view of the splendor, adorned with pickles and grilled onions.

 Matt's has a friendly feud with another joint who also claims to have the best Lucy. Mitch is confident that Matt's is the champion.

 I found a recipe for it here, and will definitely be trying to recreate this Midwestern masterpiece when I return home.
Happiest gals in the Midwest? You betcha.

Friday, March 2, 2012

Making Spring Rolls


Here's a little video of my friend Chuck teaching us how to make her vegan spring rolls.


Thanks, Chuck!

Monday, January 16, 2012

Bacon and Blue Cheese Meatloaf

The week before I hurt my arm, I had a hankering for a burger. I had some leftover bacon, blue cheese and ground chuck. I decided I didn't need to eat three hamburgers, so I switched gears and made meatloaf instead.
Besides the cheese and double meat, I added olive oil, dijon mustard, hot sauce, tomato paste, garlic, eggs, salt and pepper.

Mixing is the fun part. With bare hands is the way to go.


Form into a loaf and press into an oiled pan.


Bake at 400 degrees for 40 minutes to an hour, depending on size.

Thursday, January 5, 2012

How to Eat a Pomegranate

My roommate brought home the most wonderful pomegranates from her friend's tree. Sadly, many of them sat unnoticed in our decorative fruit basket and eventually got fed to the chickens. 

Three of them were left, begging to be eaten. It's not often that I eat pomegranate, which is a shame because they are such a delightful fruit. They have a slightly bitter taste similar to cranberries, but are much sweeter and full of antioxidants. They are quite simple to eat.

First, cut into quarters. The seeds are what we're after, since they're the edible part.
That's also where all the juice is stored.


Peel back the skin like an orange, and separate the seeds from the pith. If you drag your fingers across the seeds gently, they will just fall out.


Collect them in a bowl. It's surprising how quickly they add up.

Look how much you get from just a couple!


Now here's what you can do with them.
-sprinkle to the tops of salads (goes great with bitter greens, blue cheese, walnuts and bacon)
-put into a blender to make juice for a super dose of daily vitamins
-reduce over medium heat with a little sugar for an amazing fruit sauce or reduction (great on desserts, salad, pork, poultry and game meat)
-eat with a spoon and pretend it's cereal (your friends will think you're weird, but you'll outlive them all)
-put a few in a glass of champagne or prosecco (this is my favorite!)

Have you ever had those wonderful chocolate-covered pomegranate candies? They are small, so would work best in chocolate molds or a liquidy couverture like Scharffen Berger.

If you've never had a pomegranate, make it your impulse buy at the store for something new and different. Sorry, chickens, you got lucky but we can't waste any more of these beauties on you.

Thursday, December 29, 2011

Another Great Mini Pumpkin Idea

My roommate Sugar always comes up with the best cooking ideas. Here, she's cooked mini quiches, individual sized in mini pumpkins.


Just mix your favorite quiche, sprinkle cheese on top and bake as normal.


Best part is this bypasses the tedious crust!


Saturday, December 24, 2011

Egg Nog Cheesecake

I'm going to a Christmas party tomorrow and was at a loss as to what to bring.  I did the pie thing at Thanksgiving. There are wheat allergies, so gingerbread is out, and I'm tired of the same old chocolatey mousse stuff I bring every year. Sorry, I can't skip the wheat completely for this occasion, but I'll cut it down with a little cheesecake.

In the spring, I made the most delicious cheesecake, from one of the most delicious recipes here. This is my take, with an egg nog twist.  Keep in mind, the secret to great cheesecake is for all the ingredients to be the same temp, so make sure the cream cheese and eggs have the chill taken off before you start.


You need:
- half a stick of butter
- 1 package of Trader Joe's eggnog cookies
- 24 oz. cream cheese (3 packages)
- 4 eggs
- 2 T flour
- 1/2 c. sugar
- 1/2 c. egg nog
- 1 t vanilla extract
- pinch of salt

1. Preheat oven to 350.
2. Make crust. I used egg nog cookies instead of graham crackers. Combine entire package with 1/4 c. melted butter (1/2 stick). No need to add any sugar, the cookies are sweet enough.


If you don't have a food processor, a blender works well. (Needs to be quite powerful for cream cheese mixture.)


3. Pack crumb mixture into the bottom of a greased springform pan, pulling the edges up the sides. Chill while you mix the filling.

 4. Mix cream cheese, sugar and flour in a food processor. (I keep my sugar in a jar with dried vanilla pods for more flavor and a heavenly scent.)
 5. Add eggs, egg nog, vanilla and salt. Mix until combined.


6. Pour into prepared crust.  Bake at 350 for 40 minutes or until center jiggles when the pan is wiggled.


Another great piece of advice from the joy of baking- slice around the edge of the pan as soon as you take it out of the oven. It prevents the surface from cracking as it cools. I forgot to do this and my cheesecake has a huge crack in it; too big for me to photograph the final! Luckily, an ugly duckling cheesecake still tastes delicious.